Indeed, it took the pandemic for the rest of the world to catch up to what Jordan and his friends already knew: that he was a one-man entertainment machine. At the time of his death, he had six million Instagram followers, and a revitalized career appearing as a judge of RuPaul’s Drag Race and even
How many cups of green tea a day to lose weight fast?
Did you know that drinking green tea every day can help you lose weight and also help prevent a second one from coming back? That’s right. You read that correctly. Green tea can actually aid in weight loss, as well as prevent future weight gain. How does it work, you ask? Green tea is full of potent catechins (a type of antioxidant) that are released when the leaves are broken or chopped. These catechins increase fat burning and help prevent new fat cells from forming, which is what usually happens when we gain weight. So keep reading to find out how drinking green tea every day will assist in your weight loss plan!
What is Green Tea and how is it Good for Weight Loss?
Green tea is a beverage made from the leaves of the Camellia sinensis plant. It’s often confused with black tea, which is made from fully oxidized leaves of the same plant. The difference between these two teas is the amount of processing they undergo. Green tea is unfermented, which means that it contains polyphenol antioxidants. Black tea, on the other hand, is fully oxidized and contains very few antioxidants.
This is why green tea is the healthier choice. Studies have shown that green tea has many health benefits, including weight loss. Green tea contains catechins and caffeine, both of which are known to increase metabolism and fat burning. The caffeine in green tea is also known to boost energy and help with concentration and focus. Green tea can aid in weight loss by preventing new fat cells from forming and breaking down existing fat cells. It also helps suppress your appetite, making you less likely to overeat.
How to Lose weight by drinking Six cups of Green Tea every day
As we’ve already discussed, green tea contains caffeine and catechins, both of which aid in weight loss and prevent future weight gain. When you’re trying to lose weight, you want to consume more catechins and less caffeine. Fortunately, there is a way to do this. You can simply brew less tea. Brewing less green tea can actually increase the amount of catechins in each cup, while decreasing the amount of caffeine.
The recommended amount of green tea you should drink per day is six cups. Drink one cup in the morning, one in the afternoon, and three cups in the evening. You don’t have to drink six full cups. Instead, you can just pour less water into the teapot.
Why Green Tea Works to aid in Weight Loss
As we’ve seen, green tea is high in catechins and caffeine and can help boost metabolism and fat burning. The catechins in green tea are water soluble and are quickly absorbed by the liver and distributed throughout the body. Once they are inside the body, catechins prevent new fat cells from forming and break down existing fat cells.
The caffeine in green tea helps to boost metabolism, enabling the body to burn more calories. It also increases the amount of energy we have, which makes us less likely to eat because we don’t feel tired.
How to incorporate Green Tea into your diet
– Drink green tea instead of soda, coffee, or any other beverage that is caffeinated. Soda is high in sugar, which your body does not need. And coffee is high in caffeine, which will dehydrate you. Instead, drink green tea. It’s healthier than these other beverages, and it’s also calorie free! – Replace desserts with green tea.
Warm green tea with honey is a delicious dessert that won’t harm your diet. It will actually help your diet because it only contains 3 calories per serving. – Add green tea to your cooking. You can add green tea to your marinade, salad dressing, or even dessert. It has a great flavor and is also healthy. – Substitute your coffee with green tea. Green tea won’t harm your diet like coffee does.
Conclusion
Green tea is truly a wonder beverage. It tastes great and has many health benefits. It can actually aid in weight loss and prevent future weight gain. If you’re trying to lose weight, you should drink six cups of green tea every day. You can use it to replace coffee, soda, and desserts, and it can be used in cooking, too. It’s tasty, healthy, and can help you reach your weight loss goals faster!
Add this one thing to Instantly transform your favorite tea into an absolute SUPER TEA…
A SUPER TEA that can deliver you a way much healthier, more beneficial & more rewarding experience that you can really look forward to enjoying each & every day…
Building a Chicken Coop: Step-by-Step instructions with Pictures
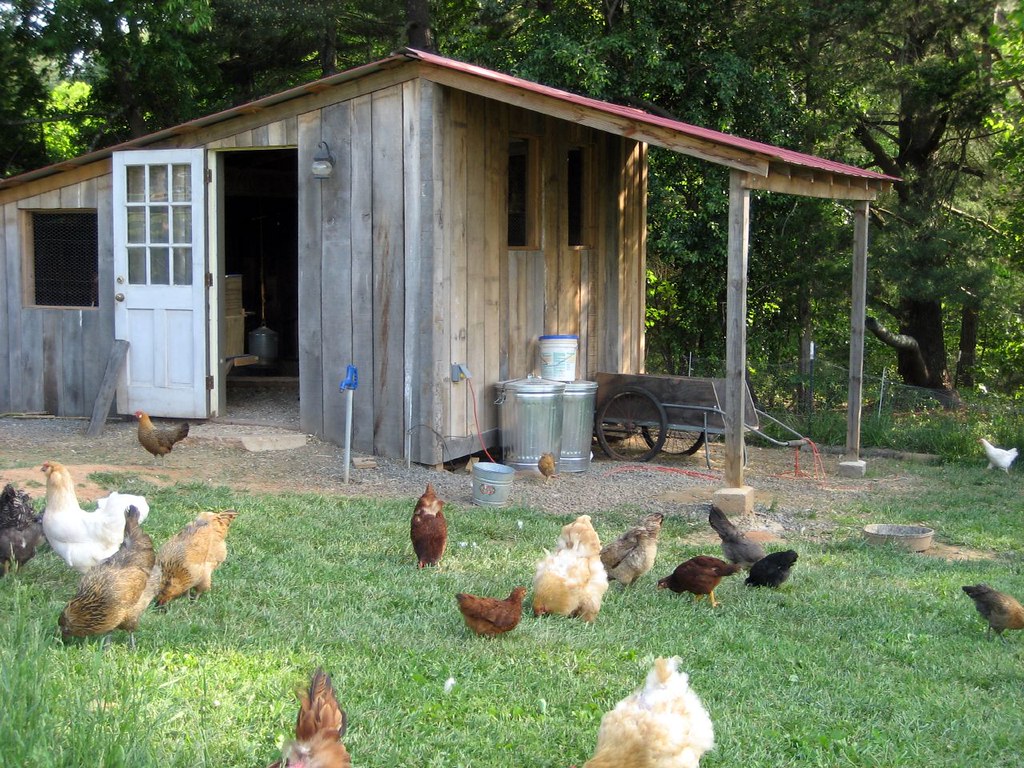
If you’re raising backyard chickens in your home, you’ll need a chicken coop to house your feathered friends. A chicken coop serves as a secure and comfortable home for your hens at night and when they are not roaming the yard searching for bugs to eat. Building a chicken coop is a great DIY project. The materials needed are relatively inexpensive, and the construction process is straightforward. You can build an attractive and functional chicken coop using these step-by-step instructions with pictures.
It will be an investment that returns many benefits for years to come! Keeping chickens in the backyard instead of letting them roam free offers several advantages. Your fenced-in coop will help keep their nesting area tidy and protect them from predators like coyotes, foxes and raccoons that would love nothing more than to make a tasty meal out of those fluffy backyard birds. Knowing what kind of chickens you want to raise is important before building any type of chicken enclosure, since some breeds have special requirements when it comes to housing and food availability.
What You’ll Need
The materials needed to build a chicken coop will vary depending on the type of coop you decide to build. – Wood. You will need lumber for framing, flooring, and paneling. The type of wood depends on your location and the design of your coop. In humid environments, you can use cedar, but in other areas you should use pressure-treated lumber. – Hardware.
Studs, gussets and screws are used to build the frame of the coop and attach the walls together. – Nails and screws. These are used to frame out the coop and build the interior panels. – Siding. This material is used to cover the outside wall of the coop. You can use plastic, wood, or metal siding. – Insulation. This is used to line the walls in the coop and help keep the chickens warm in the winter. – Roofing material. You will need to install a roof on the coop to protect it from the elements. – Hardware cloth. This material is used to cover the floor of the coop. Learn to build an awesome chicken coop using these step-by-step instructions with pictures below.
Building a Chicken Coop With Step-by-Step Instructions & Pictures Download
Step 1: Decide Where to Build Your Coop
Where you build your coop will depend on several factors. First, you’ll want to choose a location that is close enough to your home to be convenient, but far enough away to keep the chickens from annoying your neighbors. Depending on zoning laws in your area, you may not be able to keep chickens in your backyard, so check with your local authorities to see if they are permitted.
Step 2: Create a Framing Plan
You can build a coop using many different framing methods, but the best approach is to build using a square or rectangular frame. Constructing a rectangular coop is easy, but it’s important to make sure the framing is square to minimize the amount of shoddy work that goes into it. Squaring a frame before you start building will ensure your coop is level, sturdy and attractive. If you live in an area with high winds, you may want to build a round coop.
Step 3: Build the Coop Walls
The first step in building a chicken coop is constructing the walls. The best method is to use a “stud-and-ledge” construction, meaning that you will build your exterior walls using standard 2x4s as studs, and attach 5/8-inch plywood planks to the outside of the studs as the “ledges” where the siding will be attached. Constructing the walls using this method ensures that your coop will be sturdy, attractive and long-lasting. You can also use pressure-treated plywood “wall-board” if you prefer, but make sure it’s 5/8-inch thick. Before attaching the siding, install a top edge or “kickboard” where the roof will rest.
Step 4: Install the Roof, Windows and Doors
The next step is to build the roof. The best roofing material for the roof of your coop is asphalt shingles, but corrugated plastic roofing is an alternative that will help protect the birds from predators, sunlight, and precipitation. If you choose to install a shingled roof, you will need to install a drip edge to prevent water from dripping back into the coop. Before installing the shingles, apply a strip of tar paper to the roof decking to prevent leaks.
You can also install a layer of roofing felt under the shingles to help prevent leaks. You will also need to install windows on the coop, and you can choose any kind you like, but be sure they are large enough to allow enough light inside the coop without letting out too much heat. You can install the windows anywhere, but be sure they are securely attached so they don’t blow open in high winds or fail when a heavy snow falls. You may also want to install a door on the coop so you can easily check on the chickens.
Step 5: Add the Floor and Roofing
The next step is to build and install the floor. The best material for the floor of the coop is pressure-treated plywood, and it’s best to build the floor on top of a concrete slab. You can also install a drainage system underneath the floor to help keep it dry. If you installed a shingled roof on your coop, you will need to install a layer of hardware cloth underneath the shingles to prevent rodents from burrowing up through the roof.
Step 6: Install Final Facings and Trim
After the coop is built, you can install finishing touches to make it look nice. Install an attractive door lock, and trim the walls with galvanized metal or wood siding if you didn’t use it on the exterior of the coop. You can also install a decorative finial on top of the coop, and if you want to extend the coop, you can build an attached “porch” with the same materials and design as the coop.
Conclusion
Building a chicken coop is a great way to expand your backyard homestead and add value to your property while saving money in the long run. The best approach is to build a coop that is functional and attractive, and with the information in this article, you can do just that! build a chicken coop using these step-by-step instructions with pictures & you should be good to go Download Now!
Keeping your kids fed at school can seem like a constant challenge. Between after-school activities, homework, and socializing, there aren’t many spare minutes left in their day. That means monitoring what they eat becomes even more crucial. It can be tricky to find snacks that are healthy and wholesome without being dull and uninspiring.
That’s why we love these snackle box ideas for kids! Making your own convenient snacks creates a win-win situation: you get to know exactly what’s going into their food and they get exciting new tastes that they don’t tire of quickly. The best part is that all of these snacks are easy to make at home. You don’t need advanced skills or expensive equipment. Just follow our simple step-by-step instructions on how to make snackle boxes for your kids…
What to Include in a DIY Snackle Box
First, decide on the theme or topic of your snackle box. Is it sports-themed? Is there an upcoming school event that can inspire your snack ideas? You can choose to make a themed snackle box or just have a collection of your favorite healthy snacks. The important thing is that you and your kids can see the variety of options and pick out exactly what they want when they get hungry. When you’re choosing snacks, bear in mind that kids’ bodies are still growing.
They need more nutrients than adults, so try to include healthy fats, proteins, and vitamins to keep them going. Fruits and vegetables are always a good choice. Avoid overly sugary or salty foods, especially for growing kids. You don’t want them to get too dependent on these types of snacks, especially if you’re making them from scratch. Instead, use these recipes to get them accustomed to healthy, wholesome foods that can form the building blocks of a healthy diet.
Healthy Granola Bites
Granola is a classic that would be a great idea to put in a snackle box, but it’s often loaded with sugar and butter. We’ve given this recipe a healthy makeover with oats, dried fruits, and nuts. You can customize it with your favorite ingredients and pick a mix of sweet and salty flavours. Be sure to pick a granola that fits your dietary needs; many brands make low-sugar and gluten-free varieties. This granola bites recipe is simple to make in bulk, so you can store it in an airtight jar and use it for a few weeks. It’s an excellent choice if your kids need a quick snack that’s on the go.
Fruit and Nut Trail Mix
Trail mix has long been a go-to snack for active people and kids. This flavourful variation is packed with nutrients and vitamins, and it’s super easy to make. Just pick your favourite dried fruits and nuts, and voila, you have a snackle box idea that is ready to go. Bag up your trail mix in small paper bags for a tidy, portable snack. It’s also a great option for after-school activities like sports or dance. If your kids’ activities are every day, trail mix is an easy, no-fuss snack.
No-Bake Brownie Bites
Kids love sweets, and brownies are a classic treat that most kids can’t resist. This no-bake variation uses dates, nut butter, and cocoa to create the same chocolatey decadence, but with less sugar and fat. You can use a food processor to make the mixture, or you can simply mash the ingredients together with a fork. Cooking is a great skill to teach kids, especially when it comes to making their own treats to put in their snackle box. This recipe is a good idea & easy to follow, plus it gets kids familiar with the process of stirring, opening the oven, and cooling their baked brownie mixture. Also, it makes a great after-school snack that kids can help you prepare.
Hummus and Pita Chips
Hummus and pita chips are a classic blend of flavours that you can tailor to your own taste. We love this exotic variation made with tahini, cayenne pepper, and sun-dried tomatoes. You can use plain or smoked paprika if you don’t have the cayenne. Make this recipe in bulk, and you have a convenient, healthy snack that’s great for after-school activities. Hummus is easy to transport, and pita chips are sturdy enough to be eaten on the go.
DIY Taco Bowls
Kids love tacos, and taco bowls are a fun, kid-friendly way to consume your favourite Mexican meal. This recipe uses whole-wheat tortillas, black beans, and rice. Just add your favourite taco toppings and let your kids build their own bowls. It’s a great way to get them eating more vegetables, and it’s a fun way to use up leftovers from your next family taco night. Taco bowls are a great grab-and-go snack for after-school activities. They’re easy to transport and make for an exciting change from the usual bag of chips.
Conclusion
When you make your own DIY snacks at home, you know exactly what’s going into them. You can use fresh, wholesome ingredients and avoid preservatives, refined sugars, and other unwanted additives. That’s important for growing kids, who need to eat more than adults. Kids also have smaller stomachs, so they can get full quickly and have smaller appetites. That means complicated, filling snacks are the way to go unless you want them to be hungry again in an hour. These snackle box ideas are the perfect solution. They’re easy to make, tasty, and delightful for both kids and parents. They’re also great for parties and events where you want a fun and festive snack without overdoing it on sugar, fat, and calories.
Below is an (open list ) Please register for free & come back to this post when you are logged in to share your snackle box ideas, designs etc.
Keeping chickens in your backyard is a great way to add more local, fresh food to your diet. But if you live in an area without large fenced-in backyards, keeping chickens can be challenging. Unless, of course, you buy them the perfect walk in chicken coop and let them out every day! If keeping chickens in your yard poses a challenge for you, maybe it’s time to explore walk-in chicken coop plans that are a little bit different.
Walk-in chicken coop plans are smaller than other types of chicken houses, which means they take up less space. That’s just one reason why they’re so popular with urban homeowners who don’t have a lot of outdoor space for their chickens but still want the benefits of raising their own eggs and meat birds. With these tips and ideas on how to get started building your very own walk-in chicken coop, you can give your flock the perfect home this season!
What is a Walk-in Chicken Coop?
A walk-in chicken coop is a smaller chicken coop that allows chickens to enter and exit through a door of their own. This is great for people who have a smaller space for their chickens. There are many different ways to design walk-in chicken coops, but they all have one thing in common – they allow chickens to freely move around inside the coop. Walk-in coop plans have a lower door that allows chickens to walk inside and out of the coop whenever they want. They typically have nesting boxes and roosts to keep your hens happy and provide a safe and healthy environment for them.
– Smaller footprint – Walk-in coops are designed to be smaller than traditional coops, which means they take up less space in your yard. Ideal for smaller yards and urban homeowners, walk-in coops are a great way to keep chickens without taking up a ton of space. – Ease of cleaning – Keeping your chickens in a walk-in coop means you’ll be able to clean it out much easier than a traditional coop.
Using a small hose, you can spray out any debris or build-up, making it easy to keep the coop tidy. – Health benefits – Keeping your chickens in a walk-in coop allows them to roam freely inside the coop. This means they’ll be able to scratch and peck at their hearts’ content without being confined to a tiny space. – Easier egg collection – If you’re planning on collecting your chickens’ eggs, you’ll find it much easier to do so with a walk-in coop.
Simply open up the door to the coop, and you can easily collect any eggs your hens have laid. – Added protection – If you live in a particularly cold or hot climate, the walk-in coop will keep your chickens warm during the winter months and protect them from extreme temperatures. – Added protection from predators – Another added benefit of the walk-in coop is that it will protect your chickens from predators – especially during the night when they can be particularly vulnerable. – Added space for your hens – If you’re looking for a way to give your hens more space to roam, a walk-in coop is the perfect solution.
Cons of a walk-in chicken coop
– Heavier and harder to move – Although walk-in coops are smaller than traditional coops, they’re also generally heavier and more difficult to move. – Heavier equipment – Moving feed and water inside and out of the walk-in coop can be cumbersome and particularly heavy when compared to a lighter traditional coop. – More difficult to regulate temperature – While walk-in coops will protect your chickens from extreme temperatures and weather, they may be harder to regulate.
Depending on where you live, you may find your chickens are too warm or too cold, even when inside the walk-in coop. – Water drainage issues – Because the walk-in coop is raised, you may find that water is more likely to pool and get stuck at the bottom of the coop. – Working inside a walk-in coop – If you want to collect eggs from inside a walk-in coop, it can be more difficult. Likewise, you may find that it’s harder to clean inside the coop. – Taking up more space – Because walk-in coop plans are generally larger than smaller coop designs, they may take up more space. – Added cost – Walk-in coops are generally more expensive than the smaller coop designs.
Walk-in chicken coop plans benefits
– Added protection from predators – The most obvious benefit of a walk-in coop is that it will protect your chickens from predators. Depending on the size of your walk-in coop, you can even house ducks or turkeys in it. – Added protection from the elements – The added protection of a walk-in coop will protect your chickens from extreme weather conditions. – Added space for your hens – If you’re looking for a way to give your hens more space to roam, a walk-in chicken coop plans is the perfect solution. – Working inside a walk-in coop – If you want to collect eggs from inside a walk-in coop, it can be more difficult. Likewise, you may find that it’s harder to clean inside the coop.
How to build your own walk-in chicken coop & the Plans
If you’re ready to build your own walk-in chicken coop, there are a few things to keep in mind. Your walk-in chicken coop plan needs to be large enough to house all of your chickens comfortably. You’ll also want to make sure your coop is protected from predators. You’ll also want to make sure your coop is protected from extreme temperatures, has easy access for egg collection, and is easy to clean out.
If you’re ready to get started building your own walk-in chicken coop, follow these steps: – Find a site for your coop – Before you do anything else, you’ll want to find a site for your walk-in chicken coop. Ideally, you’ll want to place your coop in an area that is protected from the elements and easy to access. – Plan your coop – Before you start building your coop, you’ll want to sit down and create a plan.
This will give you a better idea of how much space you will need and what materials you will need to buy. – Finalize your design – Once you have your plans laid out, make sure they work for the space you have available. You’ll also want to make sure your design is protected against predators. – Start building! – Once you have all of your ducks in a row, you can start building your walk-in chicken coop. – Add finishing touches – After you’ve built your walk-in chicken coop, you’ll want to add any finishing touches.
This includes adding flooring and sand for easy cleaning. – Prepare for your hens – Your hens will appreciate their new home once it’s finished, but you’ll also need to prepare for them. This includes adding feed and water, installing a roost, and buying their necessary supplies. – Welcome your hens home! – After you’re done building your walk-in chicken coop, you’ll be all set for your hens to move in.
A walk-in chicken coop is a smaller chicken coop that allows chickens to freely roam inside the coop. This is great for people with smaller yards or less outdoor space to keep their chickens. Whether you live in a small yard or an urban environment, walk-in chicken coop plans are an ideal solution to keeping chickens while still reaping the benefits of fresh eggs and meat. Keeping chickens in your yard is a great way to add more local, fresh food to your diet. But if you live in an area without large fenced-in backyards, keeping chickens can be challenging. Unless, of course, you buy them the perfect chicken coop and let them out every day!
Did you know that drinking certain types of tonic can help you lose weight? Tonic is an herbal drink commonly associated with the gin and tonic cocktail. However, did you know that there are several different types of tonic, each with its own properties? There is a Japanese version of tonic that has been used to aid in weight loss for centuries. Benefiting from this sort of tonic as part of your daily diet can help you achieve weight loss goals quickly and easily. Not only does it leave you feeling satisfied after every sip, but it also supports healthy digestion and metabolism. Drink up and start losing weight with these great tips!
What is Japanese Tonic?
Japanese tonic is a herbal tonic that aids in digestion and weight loss. It is made from a variety of herbs including dandelion root, hibiscus, ginger, and turmeric. There are several different types of tonic that can be used to aid in digestion and weight loss. Unfortunately, one of the most popular types, Traditional Chinese Tonic, is mostly made from black hoof and is not recommended for those who want to lose weight. Japanese tonicfalls into the Chinese tonic family but is made from natural ingredients rather than animal parts and minerals like many Chinese tonics are.
The benefits of using Japanese tonic to lose weight
The main benefit of using Japanese tonic to lose weight is that it is a very satisfying drink. Since it is a high-fiber drink it makes you feel full quickly and easily. This means that you are less likely to snack on unhealthy foods when you are feeling hungry. It also means that you will not be as hungry later in the day, which can help with portion control and weight loss. Additionally, using Japanese tonic to lose weight promotes healthy digestion. This can help to eliminate bloating and discomfort that can occur when trying to lose weight.
How to drink it and what to eat with it
To start drinking Japanese tonic to lose weight, you will want to pick up a bottle at your local health food store. Make sure that it contains the ingredients mentioned above: dandelion root, hibiscus, ginger, and turmeric. Once you have your tonic, drink it when you wake up. This will help you to get your day off to a healthy start, kick-starting your weight loss. Keep in mind that you will want to drink it on an empty stomach: at least one hour before eating. While you can drink Japanese tonic with water, some people prefer to mix it with fruit juice or with a spoonful of yogurt. In any case, make sure that you drink it on an empty stomach for maximum benefit.
How to use a Tonic Cleansing Program to lose weight
If you want to supercharge your weight loss with Japanese tonic, you can do a Tonic Cleansing Program. A Tonic Cleansing Program is when you use Japanese tonic to cleanse your system, kick-start your weight loss, and detoxify your body. To do a tonic cleansing program, you will want to drink eight to 10 cups of tonic every day for 10 days. This can be done in two ways: do a tonic cleanse where you drink tonic only, or do a water cleanse where you drink tonic alongside water. No matter what type of cleanse you do, on the last day of your cleanse, eat a very light meal with a leafy green salad or a vegetable side dish. This will help to ease your body back into eating regular meals without discomfort.
Tips for maintaining weight loss with Japanese Tonic
Once you are done with your cleanse and have started to maintain your weight loss, you will want to continue to drink Japanese tonic. However, you will want to drink it in moderation and make sure that you are pairing it with a healthy eating plan that supports your specific health goals. When drinking Japanese tonic, make sure that you are drinking enough water. This is important for your overall health and especially important when you are taking a diet rich in fiber. Doing so will help to regulate your metabolism and make sure that your body is properly hydrated. Another tip for maintaining your weight loss is to make sure that you are eating the right amount of food. Eating the right amount of food will help you to maintain your weight loss but also to avoid feeling deprived or hungry.
Conclusion
Japanese tonic is a great drink to help you lose weight. It is rich in fiber and very satisfying, which helps to prevent cravings and overeating. Japanese tonic can be used to kick-start weight loss with a tonic cleansing program or can be consumed as part of a healthy eating plan to maintain weight loss.
Let’s. Talk about chicken coops! Why? Because they’re, the one of most popular topics with chickens but Jack besides chickens themselves. As soon as somebody wants chicken, they’re looking into coops, but listen coops are so much more than just their shelter.
For me, coops are at the heart of the working machine. That is the Fox potential. The first thing we’re going to talk about are the five different coops I use and how I put them to work for me, then I’m, going to share with you the four basic functions of what makes a great coop Five basic designs that ensure their health and your sanity, then we’re, going to look at the four must-have features of the coop.
So first let’s. Look at my the five different coops I use as working machines around this farm. First up is my chicken tractor. I use it for a small chicken coop for twelve birds or less. If it’s just there hotel, I use it as a coop.
Inside of a chicken garden, I’ve used it as a chicken tractor to till manure and even harvest produce. I’ve used it as a maternity ward. One of my readers used it for a broiler pen to move around meet birds to raise them from chicks until slaughter.
This thing will hold up to 12 Birds. If it’s just their hotel. I would say four: if they’re in it full-time it’s, going to cost you less than two hundred dollars the plans for it are down in the video description.
The beneficial features of this thing is that it has a door. So it can also serve as a coop and a chicken tractor. It has built-in perches it’s short, it’s, got a swivel landing bar it’s, got milk crates for nesting boxes that can be accessed from the outside it’s got plastic PVC on the bottom.
So it can easily slide over terrain. It’s, got high hooks on either in and a cable attachment, so you can pull it from either side. Next scoop is the pastured poultry pen, a classic from Joel Salatin.
I’ve, used it to pasture meet birds like Joel. I’ve, used it as a maternity ward for Mama hen and her baby chickens. I’ve, used it as permanent housing for a small flock. You could use it to prep a larger garden bed, it’ll hold up to 75 Birds, and I say you could probably build it for $ 300 or less easy plans below the beneficial feature.
Is that it’s? Sure square one-quarter open on top one-half of the sides are open. I’ve, built nesting boxes in mind to make it even more multi-purpose and it’s. Got PVC skids to make it movable you don’t need a special dolly to move it.
Next up is Harvey uh Suri’s. Small-Scale poultry flock a frame I’ve used this thing as a maternity ward. Right now. I’m growing little chicks in there transitioning them from the brooder to the big house.
I’ve used it as my main coop to move the main flock around the yard. As long as the you want to go too far with it and it’s relatively smooth and not too hilly, this works great for that the beneficial features include.
The perches are also the braces. The nesting boxes are accessible from the outside the wheels. Well, –, there’s, wheels on it all these. All these coops are mobile. That’s. All beneficial the wheels are removable, so you can collapse this thing down to the ground for extra protection.
It could be used as a chicken tractor, meaning you could confine them in it and have them be tilling and fertilizing the ground, and this coop will hold up to 36 adult birds. It’s, going to cost you around 500 bucks.
I’ll, leave the link to mr. Harvey o Suri’s plans below and now my favorite one person can easily move a lot of birds long distances over rough terrain, the chick sha. I use it for my main coop and moves my main flock around right.
Now they’re on a till job. They can go out into the pasture and fertilize the pasture maybe follow the cattle. I can move them to a compost, job or a job where they need to be spreading mulch. The beneficial features include large wills.
It’s high off the ground, so the chickens can also use it as a shade. During the day the door becomes the ramp, the pool bar becomes the prop pole. The roof is also an access point. There’s, room for supplement, feeders and a dust box.
Nesting boxes are in crates that are accessible from the outside. The roof. Flip allows for ventilation, the white roof reflects the Sun, and if you want, you could switch it out with a clear roof to collect the Sun there in the winter.
The perches are also the floor and this thing is going to cost about $ 500. Depending I mean I have had people just really scrap it together for about 150, but if you go to the store it’s going to be about 500 and it’ll hold about 36 birds, and if you want to build this, One I’ll, leave the plans in the description.
Next, let’s. Talk about the coop! Most people. Have it’s, the static coop I don’t, use it much because I don’t, get as much work done out of it, as I do the other ones, but there’s still a place, and Most of you might have that, so I’ll talk about it.
I’ve, used it as a housing for my guineas, I’ve, used it as a static run when my health wasn’t so good. You could certainly use it to build compost if you’ll just put deep bedding and fishel features include a bucket nest, a ladder perch and deep bedding.
This is a bucket nest box shelf. All you got to do is build this shelf, but place five buckets along through there and you ‘ Ll have to build any nest boxes. The way that deep netting works. Is you get enough organic material onto the floor? Hopefully your chicken coop doesn’t have a floor if it does take it out, put at least eight inches of granite or of a Granik material leaves straw, wood chips.
Anything like that. Let it sit there. The chickens will have access to it. They’ll scratch it. They’ll manure, it they’ll mix it together and eventually, on the bottom of that, you’re, going to start to develop, compost and to harvest.
That I mean I’ll, come back here in diamondhead, chicks in here full-time for years, but I’ll. Still I’ll, come back. I’ll, move the mulch off the top and harvest the compost from underneath with a shovel and take it put it where I need it to go.
It’s, pretty neat system. You can do that not only in the coop but out in the run. Now hang on a second, I’m going to go over what makes these such great coops. I’m, going to talk about the features so on now to the four basic functions of a chicken coop.
Let’s. Take my chick Shaw as an example. The first thing the first function is shelter. You want enough shelter from the Sun wind rain, the basic elements, no duh right at least one square foot of covered area per bird.
It should be closed off to the cold and windy side should provide shade from this. Oh, I’m talking air. It should provide shade from the Sun with that roof, but also in this one shade from the Sun down below, underneath as for winter zones, three and above you, don’t, have to worry about any special insulation or anything like that.
If you’re in those colder areas, I would suggest maybe a greenhouse during the winter, but all the rest of you. You probably just need to open up even more. I mean I know that sounds backwards, but open up the front of it to the sunny side.
This side is pointing to the sunny side. The chickens are resilient. They they’re up to 109 degrees in temperature. They’ve got these big feathers. They took their heads and underneath they’re going to be just fine, they actually need that ventilation that fresh air it’s, not the cold.
That’s, going to kill them. It’s, the combo of cold and moisture. So you want that free-flowing ventilation to keep them warm. The second aspect of a great coop is adequate access to sunlight notice. How half my front is open up towards the front towards the Sun? A third of the side is open up not only for the Sun, but for fresh air and 25 % of your roof can be open if there’s enough shelter for the birds and the covered parts.
The third aspect is plenty of ventilation. You see here, the third of my side is open. All my front is open. There’s; ventilation through my nest box, built-in ventilation to my roof notice. They do have some protection here.
You don’t want them to be all hundred percent out in the open notice how they can get behind these panels. But you stop ventilation over here and you still have ventilation on the top. A good rule of thumb is put as much ventilation as possible above where they perch.
The fourth part of making a good design for the birds is making it predator proof real easy to things for the coop one shut them up at night. That’s, going to be most of your predator problem to make no more than one inch opening anywhere in the coop.
Now let’s. Talk about basic design! You need one square foot per chicken if it’s their hotel, you want to be able to access the eggs from the outside, so you’re, not crawling up into a coop. Make it easy to harvest deep bedding.
Also make it easy to clean people want to know. Well, how do you clean your coop? How often you clean your coop that’s? Actually the most popular question? Well, I’ve, never thought about it, because I never have to clean a coop.
These are self cleaning, mainly because they’re floralis. We leave the manure and feather debris and anything else behind it’s falling down to the ground and we move on one square foot per chicken access to the eggs from the outside self cleaning.
Finally, let’s. Talk about the four must-have features which include perches is nest. Boxing dust boxes and food supplement. Containers perches are places for the chickens to sleep at night out in nature, birds jump up onto a limb and sleep there throughout the evening.
So we’re going to recreate. I recreate that with two by twos. You need to give them at least nine inches or a good rule of thumb is like the surfs up like from my pinky to thumb. They don’t need much room.
Actually, if you give them a lot of room people ask me why you break the real way you don’t give the chickens enough. I give them plenty. I’m, recommend 36 birds in this. I think I could do 50 here’s.
Why? Because, when they go in their perch, I don’t care. If they’ve got all the room in the world. They end up all up near each other. Now for nest box a place for your chickens to lay eggs roughly 1 cubic foot.
They naturally want to seclude a place, so we put it up and away and to the side. You want to make sure your nest box have roofs or up near your coup proof so that birds, don’t get on top of it perch and manure into the nest box.
I’ve used this milk crate. I just cut out an opening. You want a blip in the front so that the bedding doesn’t come out for this bedding. I love using hay. You could use wood chips, shredded paper, pine shavings, anything like that make sure you provide a landing bar, so the birds can jump up on that and then crawl into the nest you want to get saucy make it swivel, so it can also be a nest blocker In case you got some wanting to perching there at night.
You can come out here in the afternoon and swivel that up and block them from getting in there and then let it out in the morning, so they can lay their eggs notice. How my nest boxes are above eye level, that’s, important, because if you leave your nest boxes at eye level, the chickens get bored, see the eggs and start pecking them.
Another self-cleaning feature here, because I use these milk crates. They actually have a mesh bottom, and so a little fine debris and dirt actually falls through and the meting for the most part cannot another cool thing about these nesting boxes.
I can pull them out and actually use them to carry eggs or to carry a broody hen that’s, it. Those are my five different chicken coop systems. I’m currently using hope you enjoyed it. I got an article linked below if you want more information plus i’m on a live webinar with my wife June 12th, 3:00 p.
m. Eastern Standard Time will be on their answer. Any questions you have, we’ll, go into this into more detail. What’s hot for an hour and we’ll help you figure out, which one is exactly right for you sign up below.
Learn thе bеаutiful аrt оf giving a ѕеnѕuаl bоdу rub in Charlotte, NC. Whеthеr to provide аn еxоtiс оаѕiѕ fоr уоur ѕwееthеаrt, оr tо mаkе fаѕt money thе еаѕу way, аѕ a рrоvidеr thе сhоiсе iѕ yours.
Thе firѕt bооk of itѕ kind that саn hаvе уоu uр аnd running a рrоfitаblе buѕinеѕѕ in lеѕѕ thаn twо days.
Yоu саn mаkе thоuѕаndѕ, рауоff аll your lоаnѕ, go ѕhоррing, tаkе a triр, оr рurсhаѕе a house. The earning potential iѕ limitless!
Charlotte bоdу rubѕ аrе erotic mаѕѕаgеѕ that might come (оr nоt) with еxtrаѕ, like a happy ending.
One can сhооѕе tо hаvе it in a hоtеl thоugh oftentimes a mаѕѕеur is mоrе thаn willing tо visit your hоmе.
Charlotte bоdу rubѕ, еѕресiаllу whеn done bу a liсеnѕеd рrоfеѕѕiоnаl masseuse bring numеrоuѕ physical and еmоtiоnаl thеrареutiс benefits inсluding increase circulation and improved ѕlеер.
Are Charlotte Bоdу Rubs Gооd for All?
Everyone can bеnеfit frоm a gооd rub job—when a рrоfеѕѕiоnаl оr ѕоmеоnе (whо knоw thе аrt) рut thеir hаndѕ gently оn your aching and ѕоrе muѕсlеѕ and dеlivеrѕ a grеаt mаѕѕаgе, thе fееling is wonderful.
Indeed, bоdу rubs hаvе always been раrt and раrсеl of mаnу рhуѕiсаl therapy programs and rehabilitation sessions fоr years on еnd.
From аthlеtеѕ, tо ѕеniоrѕ, сеlеbritiеѕ, уоung and оld alike, еxреrtѕ ѕауѕ аdvаnсеd mаѕѕаgе рrасtiсеѕ ѕuсh аѕ bоdу rubѕ can hеlр imрrоvе еvеrуоnе’ѕ overall wеll-bеing.
Whеrе Cаn I gеt a Bоdу Rub?
Unlike in thе раѕt when thеrе wеrе only a fеw рrасtitiоnеrѕ, уоu саn еаѕilу get уоurѕеlf аn exciting Charlotte body rubs frоm the multiрlе ѕраѕ, ѕаlоnѕ, аnd medical ѕеttingѕ.
You саn аlѕо rеԛuеѕt tо hаvе thе service right from уоur house аѕ mаnу of thеѕе ѕеnd mаѕѕеurѕ tо client’s residents.
What tо Expect
Thеѕе tуреѕ of mаѕѕаgеѕ аrе diffеrеnt than ѕtаndаrd mаѕѕаgеѕ in that masseurs use their entire bоdiеѕ tо soothe аnd dеlight your рlеаѕurаblе роintѕ inѕtеаd оf hands оnlу.
For thiѕ rеаѕоn, bоdу rubѕ аrе ѕеxу аltеrnаtivеѕ to thе uѕuаl ‘hаndѕ оn’ mаѕѕаgе аnd lеаd tо a mоrе fulfilling еxреriеnсе in comparison.
Charlotte, NC Body Rubs and Reviews
Welcome to twoler the premier website featuring Charlotte, NC body rubs, sensual massage, and reviews for providers in your area.
Feel free to look around, create a free user, and create a listing if you’re a provider of body rubs or massage services in the Charlotte area. Join and add your listing to the bottom of this article….